Okay, so I’ve been messing around with this idea of making constellation cards. It’s been on my to-do list for, like, ever, and I finally dove in. I’m pretty stoked about how they turned out!
Getting Started
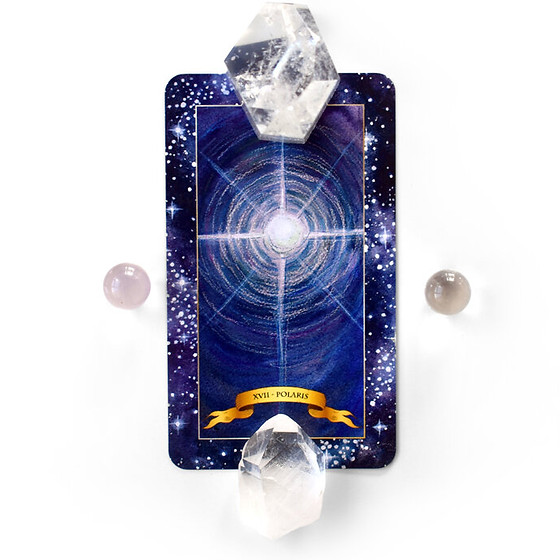
First, I gathered all my materials. I knew I wanted that classic dark blue background, so I found some sturdy cardstock. Then, of course, I needed something to make the stars. I decided to go with silver glitter glue – because, why not? It’s sparkly and fun. I also grabbed a white gel pen, some regular glue, and a printout of the constellations I wanted to use.
Making the Cards
I started by cutting the cardstock into the sizes I wanted. Nothing fancy, just simple rectangles. Then, the fun part: the glitter! I used the printout as a guide, carefully dotting the glitter glue where the stars should be. I learned very quickly that a little glitter glue goes a long way. A few of my first attempts were… well, let’s just say they were more “abstract art” than constellations.
- Tip 1: Use a toothpick or something small to apply the glitter glue. It gives you way more control.
- Tip 2: Let the glitter glue dry completely before doing anything else. Patience is key!
Once the glitter was dry (which took longer than I expected, honestly), I used the white gel pen to connect the stars and draw the constellation lines. This part was actually pretty relaxing. It felt like connecting the dots, but way cooler.
For a finshing touch, I cut some paper into smaller rectangles, wrote the constellation names and glued it on to the card.
The Final Result
I’m really happy with how these cards turned out! They’re simple, but they have this cool, handmade vibe that I love. I’m thinking of making a whole set and maybe even giving them as gifts. Or, you know, just keeping them all for myself because they’re so pretty. It’s so easy and fun, I think everyone should try it.


